Showing posts with label recipe. Show all posts

Sunday, April 3, 2016

Vegan Sweet Potato & Black Bean Enchiladas

And other good stuff.  BWHAHAHA but there's SO much yummy goodness going on in this recipe that I promise you that your family will never even realize they are vegan.  Because as the husband has told me over and over again, VEGAN FOOD IS GROSS.

My mission as we transition to more vegan food is to turn his opinion around.  And that means I DON'T TELL HIM WHATS IN THE FOOD HE'S EATING, otherwise he would probably never eat it.  Although to be fair, he always tells me that he doesn't want to know because then he wouldn't eat it.  It's a fun little game we like to play.

In addition to learning to make delicious vegan food, I also want to make it EASY and ACCESSIBLE.  I don't know about you but years ago, way before I even thought about eating a vegan diet, I always thought vegan food was crazy weird.  I mean seriously- WHAT IS THIS STUFF?!?  But have no fear, I'm going to change all that for you mmkay!

Vegan Sweet Potato & Black Bean Enchiladas
*this is a double recipe & will make two 9 X 13 pans

2 medium sized sweet potatoes
1 can black beans
1 cup corn
1/2 red onion diced
6 cloves garlic diced
1 sweet bell pepper diced
1/2 to 1 jalapeno diced
1 tablespoon chili powder
1 teaspoon cumin
salt & pepper to taste
1 28 oz can red enchilada sauce
corn tortillas

Toppings:
red cabbage
lettuce/spinach
cilantro
red onion
avocado
hot sauce
vegan sour cream
vegan cheese


Step 1:  Prep and cook your sweet potatoes.  I use the orange fleshy ones which are actually considered yams but if you know your sweet potatoes, you know there's lots of different varieties.

Peel the sweet potatoes, chop them up into nice small bite sized cubes.  Put them in boiling water with a little sea salt for approximately 10 minutes or until cooked.  Then drain out the water & set them aside to add to your filling when needed.

Step 2:  While your sweet potatoes are cooking away, saute your peppers, jalapeno, onions and garlic.  For this recipe, I prefer a sweet pepper rather than a green pepper.  I typically use a combination of red, yellow and orange because that's what I have in my fridge.  Use any color you like!  I also like to use a avocado oil or coconut oil when sauteing veggies but really, it doesn't matter too much here.

Step 3:  Add in your drained black beans, corn and cooked sweet potatoes to the pepper and onion mixture.  Add in spices, salt and pepper and adjust if needed.
The filling.

Step 4:  Time to roll up your enchiladas!  Start by putting a little of the enchilada sauce in the bottom of 2, glass 9 X 13 pans.

To warm your corn tortillas, simply put a small pan on your stove top burner and warm it up.  Then put your corn tortilla in the pan for just a few seconds until it is soft and steamy.  You could also microwave them in a wet paper towel but I prefer this method.

Now fill with as much filling as you can possibly manage in your corn tortilla.  Seriously, shove all the good stuff in there and roll it up!  Place "seam" side down in your pan.

Step 5:  Cover with remaining enchilada sauce then put some foil over the top and bake at 350 for about 20 minutes.  All your filling is already cooked so you're just warming it all and combining the flavors here, so don't overdo it in the oven.  Trust me on this one, no one wants a crunchy enchilada!

At this point, if you are NOT cooking your second pan and are instead freezing it, just label the dish right on the foil using a Sharpie and then pop it right in the freezer.  Don't forget to date it too!

*Psst....don't want to be a vegan?  Feel free to cover with some shredded cheese once it comes out of the oven.  It's good this way too!  And of course you can also TOTALLY use vegan cheese, this is actually a really great dish to try vegan cheese out on mmkay.

Now, depending on how skilled you are at shoving all the the filling inside your tortillas, this will make approximately 8-10 enchiladas per pan.  Since I'm a BIG fan of cooking once and eating twice, there is literally NO REASON why you shouldn't just make this double batch recipe and put the other pan in the freezer.  Because really, it takes hardly any time at all and it's totally worth it!

Now....here's the truly FABULOUS part.

When serving, top your enchiladas with anything your heart desires (raw cabbage, lettuce, avocados, cilantro, onion, etc) some vegan sour cream and spicy hot sauce.  Because hot sauce is THE BUSINESS- we like Cholula!

Dude.

This recipe is seriously so good.  The husband ate three of these babies just the other night and refused to believe me when I told him the ingredients.  But then again...it's not like he really wanted to know anyway....

Monday, May 4, 2015

Kale Pesto

Who knew that pesto was seriously SO easy?!?

SO good!
To make this yummy dish, you'll need to start with the Alfredo sauce base.  Then simply add in half of this kale pesto recipe and serve with your favorite pasta.  It's ridiculously simple.  Trust me.

Kale Pesto

4 cups kale
1/4 cup olive oil
1 small handful sunflower seeds
1 garlic clove
1/2 cup Parmesan cheese
salt and pepper, to taste

Combine all ingredients in your food processor.


Add pesto to Alfredo sauce- YUM!
And your done.  No joke- that's it.  I would recommend you give your pesto a little taste test and adjust the ingredients as needed.  Perhaps you like it more "nutty" so put in more seeds, or maybe you want more of a kale flavor, etc.

Now, you can warm this pesto up and serve it as is with your pasta.  I'll warn you though- for the husband and kiddo, it's just TOO MUCH KALE.  Who knew you could have too much of a good thing?!?

You can also schmear it on some toasted sourdough, you can add a few spoonfuls of it to your favorite marinara sauce OR you can add half of it to homemade Alfredo sauce- that's what this recipe is for Mmkay....  It's seriously amaze-balls good and so versatile.  And probably the very best way to get your family to eat kale.  Because kale is weird and most assuredly, an acquired taste but this pesto makes it easy and yummy.  Promise.

Look at that yummy creamy Kale-ness!

Tuesday, March 3, 2015

Vegan Cauliflower Soup

Love this dish!  The ingredients are simple and it's packed FULL of veggies.  Plus both the husband and kiddo happily eat this- now that's perfection in my book!

Plus it's vegan....shhhhh....don't tell....

SO good!
Vegan Cauliflower Soup

2 Tablespoons olive oil
1 medium onion, diced
2 stalks celery, diced
1 large carrot, diced
1 garlic clove, diced
2 small/medium potatoes, diced
1 small head cauliflower, chopped
1 cup veggie broth
4 cups water
2 teaspoons salt
2 Tablespoons fresh parsley, chopped
1 cup raw cashews with 1 cup water
1 1/2 cup peas

Step 1:

Saute all the veggies except the peas in olive oil.  Don't worry about a perfect chop, you'll be blending this all later.

*Tip- you may want to reserve about 1/2 cup of your diced potatoes to add in AFTER you've blended your soup.  The husband likes a few chunks of potatoes in his bowl.

Add in salt and parsley.

Step 2:

Pour in veggie broth and 4 cups of water.  Bring to a low boil.

Step 3:

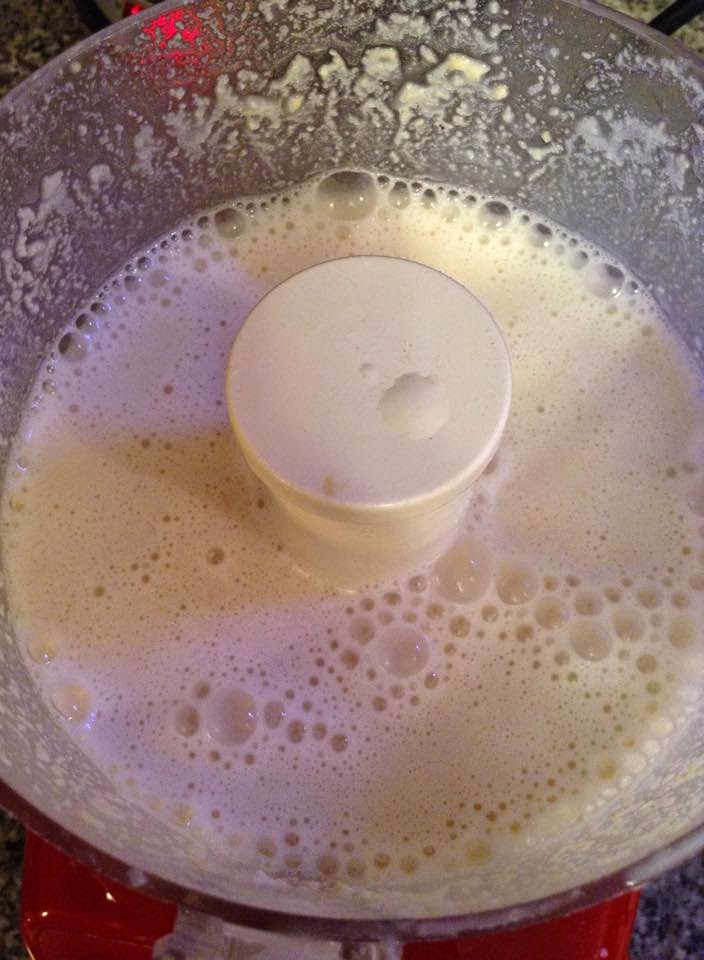
Blend cashews with 1 cup of water in a food processor.  Add to your pot and continue to cook on low boil for at least 30 minutes.  The longer the better with this dish!


Step 4:

Get out your trusty immersion blender and blend baby blend!

If you reserved a few potatoes, now is the time to add them in along with your frozen peas.  Cook another 10 minutes or until potatoes are done.


Serve with a rustic bread or better yet, the kiddo's favorite- in a bread bowl!  Yum!

Monday, January 26, 2015

Fettuccine Alfredo

One of my many talents is the ability to whip up a batch of homemade fettuccine alfredo in about 20 minutes.  No Joke.

And because I think you all are awesome and should have this recipe in your repertoire- I'm sharing with you today!
SO good!

Fettuccine Alfredo

1 box fettuccine pasta
2 1/2 cups milk
1 cup heavy cream
1 1/2 cups Parmesan cheese
butter
2 tablespoons flour
salt and pepper
nutmeg

Start by boiling your pasta.  At the same time, begin your sauce by melting 2 tablespoons butter.  When melted add in flour to create a roux.  Cook on very low for just a minute.  When your flour and butter are combined, start to slowly add in your milk and then cream.
Cook your flour in melted butter to create a roux.
Slowly add in milk/cream for nice, thick sauce.

Finally, when you have a thick sauce- add in your parm cheese and salt and pepper to taste.  At this point, your pasta should be done.  So drain and set aside.

When your parm cheese is combined in your sauce, put one more tablespoon of butter on top and a good pinch of nutmeg.  Combine with your pasta.
Finish with butter & pinch of nutmeg.

Seriously- SO easy.  You can totally add cooked chicken or some veggies but we are purists and like it just the way it is.

Enjoy!

Thursday, August 28, 2014

Vegan White Bean & Avocado Hummus

This recipe is AMAZING!  No joke.

So- I found the original recipe here from Two Peas and Their Pod and then I made a few changes.  The original is great and I encourage you to try it out.  This fellow Mommy blogger has some great recipes, so please browse her website- I'm a huge fan!  With that being said, I really enjoy this dish with the changes I've made.  You'll be astounded that something SO simple can taste SO good!


Vegan White Bean & Avocado Hummus

1 15 oz can white beans *I use garbanzo
1 ripe avocado
1 tablespoon fresh cilantro
1 tablespoon white onion
juice of half lemon
2 tablespoons olive oil
1 small clove garlic
1 1/2 teaspoon sea salt
1 teaspoon fresh cracked pepper
small pinch cayenne pepper

The directions for this are RIDICULOUSLY easy.

Dump all the ingredients in your food processor and blend away.  If you're making this for sandwiches or prefer to leave some larger chunks (which sometimes I do) then leave out a few beans and some avocado and add back in later.  Otherwise just pulse away.


Then- and this is super duper important- put it in your fridge for at least a couple hours.  Trust me on this one!

When the mixture has chilled in the fridge for a bit, you can eat it with some yummy Late July chips, put it in a tortilla for a wrap, scoop some on top of lettuce and eat it as a salad, slather it on some toast, eat it with some tomato and lettuce in a sandwich- seriously...the sky is the limit here!  I call this a hummus because it has a thicker consistency- much like hummus.  But as you can see, its super versatile!

I can't thank Two Peas and Their Pod enough for this starter recipe.  But secretly, I hope you'll give my recipe a try too!

Enjoy!


Thursday, August 21, 2014

Homeschooled Housewife's MASTER Recipe List


Creamy Tomato & Spinach Pasta 
Breakfast Foods:


Vegetarian:


Quinoa Enchilada Casserole


Lentil Shepard's Pie


Cauliflower Soup


Vegan:


Crockpot Shredded Beef
Meat:


Done in Just 30 Minutes:
Kale Pesto


Snacks/Misc.


Blueberry Peach Cobbler 


Desserts:


DOG Food


*Check back often since I'm always posting new recipes to the blog!  I will do my best to keep this master list updated so make sure to bookmark it.  And don't forget to check out my Menu Planner!


Saturday, August 2, 2014

Wait- This isn't Clam Chowder!

And that's exactly what the kiddo said after taking just one bite.  "Mom!  You said we were having chowder!  This isn't clam chowder!"  But not too worry, he still liked it and even went back for seconds of this super yummy and easy to make Corn Chowder.

Now- you can totally make this vegan by skipping the last step and using veggie broth instead of chicken broth.  You can also please the carnivores by sauteing your veggies with bacon- it does add a really rich and delicious flavor.  But for us- we like it just the way it is, so without further ado-

Homeschooled Housewife's Corn Chowder

4 1/2 cups frozen corn or approx 7-8 ears of corn, shucked
3 medium potatoes, diced
1 medium onion, diced
6-8 cloves garlic, diced
4 celery stalks, diced
2 tablespoons olive oil
1/4 teaspoon thyme
3/4 teaspoon paprika
4 cups chicken broth
1/4 teaspoon red wine vinegar
salt & pepper, to taste
bay leaf
1/2 cup heavy cream, optional
shredded cheddar, garnish

Step 1:  Saute onion, garlic and celery in olive oil.  If you are using bacon, simply saute it with the bacon and about half the oil.

Step 2:  Add thyme, paprika, salt, pepper, bay leaf, potatoes, corn and chicken broth.  Continue cooking on low boil for 30-60 minutes.

Tip: Reserve about 1 cup corn and small handful of diced potatoes to add in later.  Trust me on this.

Step 3:  Get out your immersion blender and blend baby blend!  But don't forget to take out your bay leaf first!  Add in your red wine vinegar and reserved corn and potatoes and cook another 15 minutes or until potatoes are cooked.

Step 4:  Finish with heavy cream.  Garnish with shredded cheddar.

Corn Chowder- YUM!


Tuesday, July 29, 2014

I'm Too Young to Die

That's the first thought we had upon hearing that the husband was at risk for developing type 2 diabetes.  "He's too young."  Shit.

Now, if you've been living under a rock for the last decade- you may not be aware that type 2 diabetes is increasing at an alarming rate.  This type of diabetes is of course mainly considered a "lifestyle" disease because you typically get it as a result of a bad lifestyle.  Simple enough, right?  The good news is that because of this, you can also reverse it.  Yay!  I'm all for that!  And of course that's just what we did!

Diet is the first place you should start and that's what I'm going to focus on here.  Since we had already started on our food journey, this was pretty easy for us.  We had already started by eating less meat and cut out most of the fatty foods.  So yeah- you should do this too.  Then add in as many whole foods as you can.  Those processed foods are scary!  Lots of hidden salt and sugar so its best to make as many foods at home as you can.

Finally, do a little research on which foods are best for those who are at risk.  But because I'm totally awesome, here's a great article courtesy of Natural News.  This is a great list of 10 foods that are super easy to add in to your diet.  There's also some supplements you can take to help as well- the husband personally takes cinnamon and I highly recommend this one.  But as with anything- please do your own research and consult your own medical professional before starting on any major changes.

Oh- and if you're wondering how you're going to make these changes or get your picky family member to eat these foods, I'm here to say- it can be done.  The husband hated kale.  He also doesn't like blueberries or almonds.  But you know what- I got creative and now he happily eats them and enjoys it! True story.

Our preferred method of getting kale in our diets is by drinking these yummy Green Smoothies.  And I just concocted a Blueberry Smoothie that is equally fabulous.  Both are easy to make and provide a ton of health benefits.  Not too worry- I'll share the recipe below for the newest smoothie!

So the next time you hear that someone you know is at risk for developing type 2 diabetes- I hope you'll share this with them.  It's not too late.
Great for breakfast!

Blueberry Smoothie

2 cups fresh or frozen blueberries
3/4 cup plain or vanilla yogurt
1/2 cup milk
1 frozen banana
2 Tbls honey*
2 tsp chia seeds


Defrost your banana for 10 minutes prior to using.

Dump all ingredients in your blender and blend away.  This will make enough for 2 people and as always, please try to use all organic ingredients.

Enjoy!

*The honey is optional.  However, local, raw honey is SO good for you and I highly recommend you add some in if you have it.

Raw, local honey is where it's at!!!


Thursday, July 24, 2014

It's All About the Tots

Who doesn't love tator tots?!?  Seriously, they are SO good.

A few years ago, I saw a recipe for something called Tator Tot Casserole and I just knew that I had to make it.  Seriously- tots as the main ingredient?  You know it's gonna be good.  So I clicked on the link and sadly, the rest of the ingredients left something to be desired.  Canned cream of mushroom soup, bricks of fake Velveeta cheese, factory farmed ground beef....umm, yeah- no thanks.  I think I'll pass on that processed crap.  But still....tots....oohh how I love the tots.  And so was born the "Gimme Some Tot Casserole".


You'll probably notice that most of my recipes here on the blog are meat free.  Well that's because we simply don't eat a lot of meat.  But when we do- this is one of our favorites.  I also want to mention that for us- this is an indulgence.  The tots are greasy and combined with the cheese and meat- it makes for a heavy meal.  So you probably won't want to make this every week!

For this recipe, I only use 1/2 pound of ground beef.  Most folks would use a full pound, so feel free to increase this amount if you'd like.  Would you believe that my family only eats about 2 pounds of ground beef each month?!?   I know- crazy right?  But if you're looking to cut down on your meat consumption or just want to save a little money on the ever increasing costs of food- this is an easy way to do it!

This meal will serve a normal family of 4.  Or perhaps a family of 6 with several small children.  You will also have a little bit leftover for lunch the next day.  Not a lot- just a little.

Let's get cookin'!


Gimme Some Tot Casserole

1 1/2 bag tots
1/2 lb ground beef
1 small onion, diced
4 cloves garlic, diced
3 cups milk
2 tablespoons flour
1 tsp beef bouillon
4 oz shredded cheddar cheese
2 tablespoons sour cream
salt & pepper


1.  Put your tots in the oven according to package directions.  Don't forget to set your timer!

2.  Cook your ground beef, onions and garlic.  Drain the excess grease (but let me just say you won't have much to drain if you're using local, organic meats) and return to the pot.  Now sprinkle the beef mixture with your flour and cook on low for a few minutes.  The mixture will start to thicken- so begin adding in your milk, about 1/2 cup at a time and then add the beef bouillon.

Tip- We use this beef bouillon, which is really more of a beef base.  It just adds another level of beefy goodness to the casserole.  You can leave it out if you don't have this ingredient or just use one of those cubes of beef bouillon, however I do not recommend those.  So I hope you'll try to find this beef base or better yet- make your own!

3.  Once you've added in all your milk, season with salt and pepper.  Your mixture should be just a little thick but not runny.  Add more milk if you need to and finish the meat sauce by adding in the sour cream.  By this point, your tator tots should be done cooking- so pull those puppies out!

4.  Now it's time to build your casserole.  I use a glass 9 X 13 pan, spray it so it doesn't stick and place a layer of tator tots first.  Then your meat sauce, then some shredded cheese.  Repeat this layering until you've used up all your ingredients.  You can totally add more cheese if you'd like, just adjust to suit your family's tastes.

Tip- At this point you can also add veggies to your casserole.  However, my family is hardcore and we prefer to eat it as is- no green in sight!  Although I do serve the veggies on the side.


5.  Bake at 350 for about 30 minutes.  Keep an eye on it- you just want to combine everything and get the cheese nice and melted.
SO Good!


So there you have it.  Super yummy and easy casserole.  This recipe works great to double up on too.  I just make a double batch and put one in the freezer before cooking.  Perfection!


Saturday, July 12, 2014

Homemade Mac & Cheese

This is one of the husband's favorite meals.  Seriously- he can't get enough of this stuff.

The original recipe came from the husband's Grandma.  They were in town visiting one Christmas and I asked her to show me how to make this favorite dish.  It was good folks- no, beyond good, it was awesome.  But the original recipe had WAY too much cheese, grease, fat etc and there was NO WAY that I could feed this to my family with a clear conscience.  I'm not even kidding- there was 2 pounds of cheddar and 2 packages of bacon and a full stick of butter!  Ack!  So over the years, I've lightened it up a bit and adjusted the ingredients to fit our organic, non GMO lifestyle.

The results....pretty darn awesome.

Homeschooled Housewife's Homemade Mac & Cheese

8 oz sharp cheddar cheese
4 cups milk
2 tablespoons butter
2 tablespoons flour
6-8 slices turkey bacon
16 oz penne pasta
salt & pepper to taste
pinch of nutmeg
heavy cream


The ingredients are simple.  The process is easy.  Start by boiling your water for the pasta, the husband likes this with penne pasta but you could use whatever you like.  Then put your bacon in the oven, 375 for 8-10 minutes.  We use Applegate organic turkey bacon and yeah- I cook bacon in the oven.

Once you start the water boiling- begin on your sauce.  Super easy.  If you know how to do a bechamel sauce, the process is identical.  And folks- this is one skill you simply must have.  Making a good homemade bechamel sauce will come in handy more times then you can count- so trust me & learn how to do this!

For the sauce- melt your butter & then add the flour to it.  Cook on very, very low heat for just a minute.  You're basically cooking off the flour taste.  Then slowly add in your milk- 1/4 to 1/2 cup at a time.  You want it to slowly thicken with the flour/butter mixture.  Continue adding all your milk, making sure to stir often so you don't scald it.  Once you've added your milk- time to dump in the cheese.  Use a good quality cheese that melts.  We use Organic Valley sharp cheddar- just cut it up into small chunks and slowly add to the milk.  Don't put it in all once!

By this point, your pasta should be done cooking.  Don't forget to check your bacon- better yet, set a timer!  Drain your pasta and set aside.  Cut up your bacon and add to the sauce.

Finish your sauce by adding salt and fresh ground black pepper.  Go easy on the salt since there's already salt from the cheese and bacon!  You can also add a little bit of heavy cream at the end to give your sauce a richer flavor.  It's not needed and if you're trying to lighten up this dish- then skip it.  But when we want to indulge, you know I add at least a 1/4 cup of heavy cream!  A pinch of nutmeg and you're done!

Combine your pasta and sauce and put into a large cassarole dish.  Now- you can totally cook this a little in the oven or just eat it as is.  We do both.  The husband likes it cooked a bit, 375 for about 20 minutes while I like it fresh from the stove top.  As with any recipe, I urge you to use only organic ingredients.  You can also get fancy and use a combination of different cheeses or fun shaped pastas.  Trust me when I say that using quality ingredients just makes your food taste better!

Enjoy!


Tuesday, April 29, 2014

Quinoa with Black Beans, Corn & Cilantro

This is the recipe that I give to everyone who is new to quinoa.  If you've never made a dish with quinoa before or think you don't like how it tastes- I encourage you to give this a try.  It's super simple, healthy and tastes great!  Plus, it's easy to customize to your individual tastes.  It's simply perfection.

Black Bean, Corn & Cilantro Quinoa

1 Tablespoon olive oil
1 medium onion, chopped
3-6 cloves garlic, depending on how much you like
1/4 teaspoon cayenne
1 teaspoon cumin
2 teaspoon chili powder
1 1/2 cup veggie or chicken stock
1 1/4 cup frozen or fresh corn
2 cans (15 oz) black beans, reserve some liquid
1 can (15 oz) diced tomato
3/4 cup fresh cilantro, chopped
3/4 cup uncooked quinoa, rinsed
salt & pepper to taste
avocado

Step 1:

Rinse your Quinoa!
You MUST rinse your quinoa.  I've found that it's easiest to rinse in a measuring cup.  If you try to use even a small colander, your quinoa will simply spill out the bottom.  When you're done rinsing, set it aside for later.

Step 2:

Saute your onion and garlic in the olive oil.  I use all organic ingredients and encourage you to do the same, especially with your olive oil!

Add in your spices and saute for another couple minutes until your onion is translucent.

Step 3:

Stir in the remaining ingredients.  So now is the time to add your corn, tomatoes, black beans and quinoa.

It will look a little "soupy".  Not too worry, after
the quinoa cooks, it will thicken.
I like to use frozen organic corn because it's easy and yes, I don't defrost it.  Just take it out of the freezer & dump it in.  I also reserve some of the liquid that comes in the canned beans and pour it in.  Usually it's about 1/2 cup from both cans of beans.  And you guessed it, the juice from the canned tomatoes goes in too!

*Tip- now's the time to add additional spices if you like it hotter.  Increase the amount of chili powder, you can add a splash of Tabasco or even a jalapeno pepper.

Step 4:

Bring to a boil then turn down to low and allow to simmer for 30-60 minutes.  You don't want to overcook your quinoa but simmering for 60 minutes will really bring out the flavors.

Garnish with a little fresh cilantro, sour cream and cheese.  It's also great with sliced avocado and chopped green onions.  We like to eat it with tortilla chips on the side, SO good!

Makes 4 servings.


*Full disclosure- I found an original recipe for quinoa with black beans and corn and I've adjusted it a bit to suit my family's tastes and preferences.  I do not have the link to the original recipe, otherwise I would give full credit to whoever came up with this awesome base recipe.  So please know, that I am in no way attempting to take credit for coming up with this great recipe.  However, I did make changes, so this "new" recipe is directly from me.  Enjoy!


Monday, April 14, 2014

Recipes Every Mother Needs

About 5 years ago I set a challenge for myself- Find THE perfect recipes for many common dishes.

Part of being a great Wife and Mother- not to mention, a wonderful hostess- is perfecting the craft of cooking.  And let's face it- we can't all be excellent cooks.  Sometimes it takes work, practice and a little trial and error.  I can't even tell you how many meatloaf recipes and chocolate chip cookie recipes I've tried in an effort to find THE perfect one.

But the ability to make a few dishes REALLY well is an easy way to impress your family and guests.

Here's a list of meals that I believe every Traditional Wife and Mother should excel at:


Chicken Noodle Soup
Meatloaf and Mashed Potatoes
Chili
Chocolate Chip Cookies
Chocolate Cake
Roast Turkey, whole
Burgers
Apple Pie
Pumpkin Pie
Macaroni and Cheese
Roast Chicken, whole
Pancakes
Waffles
Biscuits
Cinnamon Rolls
Spaghetti
Oatmeal Cookies
Enchiladas
Steak marinade
Egg Salad
Rice Krispie Treats
Cupcakes
Blueberry Muffins
Lasagna

I'm sure I've left off a few but this was the list that I started with over five years ago.  I am happy to say that I've perfected almost every single one.

You should also have some easy side dishes and some hor d'oeuvres on your list.  I'm a big fan of Beer Cheese dip (served cold), Artichoke and Spinach dip (served warm), Baked Potato Casserole, Garlic Green Beans, roasted veggies and of course you should know how to cook potatoes and eggs several different ways.

Please keep in mind that these items on the list are 100% made from scratch.  I do not use a mix for pancakes or biscuits and you better believe that my marinara sauce is completely homemade!  No cheats allowed!

So today I want to challenge you.  Think about what recipes might be on your list or simply use this list as a guide.  Then begin the process of perfecting each one.  It might take you a very, very long time but it will be well worth it in the long run!


Thursday, February 20, 2014

Pumpkin Bread

This is a favorite in my house.

During the Fall and Winter seasons, I make this recipe several times per month.  I can't seem to make it fast enough- because as soon as it comes out of the oven, one loaf is already gone!

Since I've received a few requests for my recipe, I decided it was time for me to post it here!  Full disclosure, this is not MY recipe.  I got it from Better Homes and Gardens and I have not made one single change.  It's perfect just the way it is!

Pumpkin Bread


1 cup oil
3 cups white sugar
4 eggs
3 1/3 cups flour
2 teaspoons baking soda
1 1/2 teaspoon salt
1 teaspoon cinnamon
1 teaspoon nutmeg
2/3 cups water
1 15oz can pumpkin

Combine oil and sugar in mixer.  Slowly add in eggs.  Mix dry ingredients together in another bowl and slowly add to mixer.  Alternate adding the dry ingredients with the water.  A little dry, a little water, a little dry...you get the idea.  Finally, add in your canned pumpkin.  My boys like raisins in their pumpkin bread, so I always throw in a handful or two.  I also use all organic ingredients but the choice is totally up to you!

Cover with foil and bake at 350 for about 65 minutes.  Use 2 regular 9x5x3 loaf pans.  If you don't mind your loaves just a little smaller, you can stretch this batter out to 2 of the regular sized loaf pans and one smaller loaf pan.  If you choose to go this route, you will only need to bake the smaller pan for about 30 minutes.  Just keep checking on it- you don't want burned pumpkin bread!

Let your loaves cool before removing from the pan.  Slice and stick one loaf in the freezer for later in the week.  Perfection!


Tuesday, February 11, 2014

Honey, Lemon and Ginger Tea

Besides coffee- this drink is my favorite.  It's super healthy for you, easy to make and tastes amazing!  It's SO good, even the kid likes it!  We drink this most often during the Fall and Winter months but it's good all year round!

I like to mix up all the ingredients ahead of time and store in a canning jar in the fridge.  Then when I want to make up a cup of tea- all I have to do it add the pre made ingredients to my hot water.  Easy peasy!  

Three Simple Ingredients
Here's how you make it:

1 cup raw local honey- organic
1 organic lemon, thinly sliced
1 "thumb" sized piece fresh ginger, peeled & diced

Simply combine- no need to squeeze the lemons and store in the fridge.  Make a few jars of this and give the ingredients plenty of time to combine and blend in the fridge.

To make the tea, simply add 2-4 tablespoons of your honey, lemon and ginger to 8 ounces hot water.  My son doesn't like it as strong, so he gets 2 tablespoons.  I, on the other hand, LOVE this stuff- so I prefer it nice and strong!

Why do we drink this?  Besides the fact that it tastes great- these three ingredients are powerhouses of health and well being.

HONEY

Helps to soothe a sore throat and acts as a natural cough suppressant.  It also boosts your body's immune system.  Always buy local raw honey if you can as this has the added benefit of pollen specific to your area which helps protect you against local seasonal allergies.  It also relieves aches and pains, stabilizes blood sugar and blood pressure and helps to calm your nerves.

LEMON

A natural antioxidant that helps boost your immune system and provide much needed Vitamin C.  Helps to get rid of the toxins in your body.  Reduces inflammation and swelling.  Helps to prevent against cancer, stroke and heart disease.  Acts as a digestive aid and helps to cleanse your liver.

GINGER

Great for calming an upset stomach and digestive issues, including nausea, morning sickness and diarrhea.  Aids in detoxification of the body and acts as an anti inflammatory and antioxidant.  Also great for relief from arthritis, menstrual cramps and muscle pain.


Monday, December 30, 2013

How to Make Homemade Broth

I hate to admit this- but not too long ago whenever I would make a whole roast chicken, I never made chicken broth with the leftover bones.  As in never ever.  Ugh...what was I thinking!?!

The reality is that I was just a bit intimidated.  It sure seemed like a lot of work just for some chicken broth.  Am I right?

But the times they are a changing!  You may all know by now that we only eat organic meats.  Eh- or maybe you don't.  But for my family, that means that a small, whole roast chicken costs $20.  Yikes!  As a result, we simply don't eat as much meat because we can't afford to.  However, now that I'm spending $20 on a chicken, you best believe I use every single part of it.

Waste not, want not.

For the purpose of this post- I'm using my leftover Christmas turkey.  Because well- it's just 4 days after Christmas and I have GOT to get this turkey business handled.  Here's how I turn one, 15 pound turkey into several months worth of food for my family, 6 months worth of fresh broth and 1 months worth of dog food for my 2 beloved furry babies.
Turn one turkey into turkey broth, turkey meat & dog food!

Step 1-

  • Carve all the good, edible meat from the turkey.  Put in ziploc bag labeled "People Turkey" and don't forget to date it.  Store in the freezer.  This meat will be used for turkey pot pies, turkey noodle soup, turkey tortilla soup- etc.  For my family, this will last us several months since we so rarely eat meat.
  • Pull the remaining meat off the bone that you will not eat and put in a ziploc bag labeled "Puppy Turkey" and again, don't forget to date it.  Stick this in the freezer too!  I usually have enough puppy turkey to make 2-3 weeks worth of dinners for our 2 dogs.
Step 2-
  • Throw everything else into a large stockpot and fill with water.  And I'm talking EVERYTHING!  The fresh herbs you cooked inside the turkey, the lemons, garlic, onion, the bones, the skin- everything.  Then add 6 large carrots, 4 celery stalks, 1 head of garlic (just cut in half, no need to peel), 1 onion- quartered, another lemon- cut in half and fresh cracked pepper and sea salt.  Bring to a boil, then turn down to a simmer.  Cook for several hours.
  • Once your turkey bones and veggies have cooked for a few hours on low, turn it off and let it cool for at least an hour.
Step 3-
Fill ice cube trays with
 broth & freeze
  • Now comes the fun part!  Get your strainer and pour the liquid into a large measuring cup or basically anything you can pour out of.  Then fill up ice cube trays with your strained broth.  Pop the ice cube trays into the freezer.
  • Allow the broth cubes to freeze and then simply pop them out and put into a ziploc bag labeled "Broth Cubes" and you guessed it- don't forget to date it!  
  • When you have a recipe that calls for chicken or veggie broth, simply take some of these broth cubes out of the freezer and add some water.  Add 2 cubes to 1 cup water to make 1 cup of liquid broth.
Step 4-
  • The remaining veggies and meat pieces are going to be turned into dog food.  I do this all by hand so that I don't accidentally put a bone into the dog food.  NEVER FEED YOUR DOGS THE BONES!
  • Separate the tiny bits of leftover meat, smush up the veggies and mix all together into a bowl.  I usually end up with about 6 cups worth of meat and veggies.  When it's time to feed your dogs, simply add 1/2 cup of this mixture to dry food.  Or this can also be added to brown rice, pasta, lentils- etc.  My dogs love it and homemade dog food is so much better for them!
    The leftovers from your broth,
    makes great dog food!
What always amazes me about this process is exactly how much meat is still left on the bones after I think I've cut all the good meat off.  There's SO much edible meat here, you'll be surprised!  And if you noticed- I have used almost all of this turkey.  Even the veggies I used to make my homemade turkey broth get used!   

And there you have it.  Super easy to do, if a little time consuming.  But well worth it for sure!

Sunday, November 3, 2013

Yogurt Berry Smoothie

Of all the smoothies I make, this is my #1, most favorite of all!

Super simple and healthy and so easy an 8 year old could make it.  Now if only I could actually get him to MAKE it....

My son drinks this at least once per week and my husband loves them too!  Whenever I whip up a blender full, I will always pour the remaining smoothie mix into my awesome Ice Pop Molds.  For those dying to know- yes, these are the EXACT same ones I use at home. I got the idea from 100 days of Real Food and I'm SO glad I did!

So here it is, my recipe for the easiest smoothie ever!


Yogurt Berry Smoothie


1 cup frozen berries
3/4 cup milk
1 cup plain or vanilla yogurt
2 tsp chia seeds


Sometimes I will throw in a little Kale and hope that the kiddo doesn't notice.  To which he always does!  Other times I will drizzle in a little local organic honey- but not too much!  Also- you can experiment with the milk and yogurt amounts.  Some like a thicker smoothie while others prefer something more "liquidy".  Ha!  Is that even a real word?!?

But seriously- how easy is this?!?  Just dump all the ingredients into your blender & away you go!  This recipe will make enough for two smoothies, so don't forget to double or triple if you need more!
Frozen Berries work best!

You can also use one kind of berries to make a single flavor smoothie.  Raspberry Smoothies, Blueberry Smoothies (BTW-kale taste GREAT with blueberries!), Strawberry Smoothies- seriously, anything goes here!

I usually make a Mixed Berry Smoothie using these tasty frozen berries from Trader Joes.  My son is not a fan of blueberries but they are SO good for you!  So this is an easy way for me to sneak them into his diet.  SSSHHH- don't tell!

Want to check out my other Smoothies?


Tuesday, October 29, 2013

Green Smoothie

We've started drinking this yummy & healthy Green Smoothie several times per week.  And whenever I'm not feeling so well, my tummy is hurting, I'm tired or just a general case of the Blahs- I whip up one of these and instantly feel SO much better.

The kiddo is not a fan of these, he prefers my Yogurt Berry Smoothie's instead.  However, the other day he ate a cheeseburger from Five Guys and his tummy wasn't feeling well.  And wouldn't you know it- he actually asked for a Green Smoothie!!!  Seriously, my jaw was on the floor.  On.  The. Floor.

So here's the recipe, I hope you'll give it a try!
Green Smoothie

Green Smoothie

  • One large handful of frozen pineapple
  • 1 green apple, core removed        *alternately you can substitute the apple for blueberries but this will change the color of your smoothie
  • 2 big leaves or 2 handfuls of kale
  • 2 stalks celery, cut up
  • 1/2 cucumber, cut up
  • 2 cups cold water

Dump all the ingredients in the blender and blend away.  You may need to add more water depending on the consistency.  It's helpful to put the frozen stuff in first, followed by the chunks of celery and cucumber.  I layer the kale in on top and then pour in the water.  My ancient blender prefers it this way.  But really- it doesn't make a difference.

Then simply pour it into a cup.  This amount will make enough for 2 large servings or 3 medium sized servings.  I typically fill a super large plastic cup for the husband to take with him on his drive to work and then I have enough for a medium sized glass for myself later in the day.

You could also pour any extras into a Mason Jar or other container with a lid.  Just shake and drink later on whenever you want it.

So there you have it.  My Green Smoothie recipe.  Super easy, takes less then 10 minutes and will make you feel great!!  Enjoy!