Step 1:
Cut out your tree "trunk" using brown paper grocery bags. Remember back in the "olden days" when we would use these brown paper sacks to cover our school books? Make the cuts in the bag just like you would for a book cover, simply cut off the bottom of the bag and unfold the sides to make one long strip.
 |
| Cut along the side. Then completely cut the bottom of the bag off. |
Next, you can trace a tree trunk design or do it free form, I prefer free form. Just cut wavy lines and a wider base at the bottom. I use 2 bags to make a nice long tree trunk.
Step 2:
Tape your pieces together and attach to your wall. Make sure you are using tape that won't ruin your wall paint! Holy Moly would the husband be pissed if I damaged the walls!
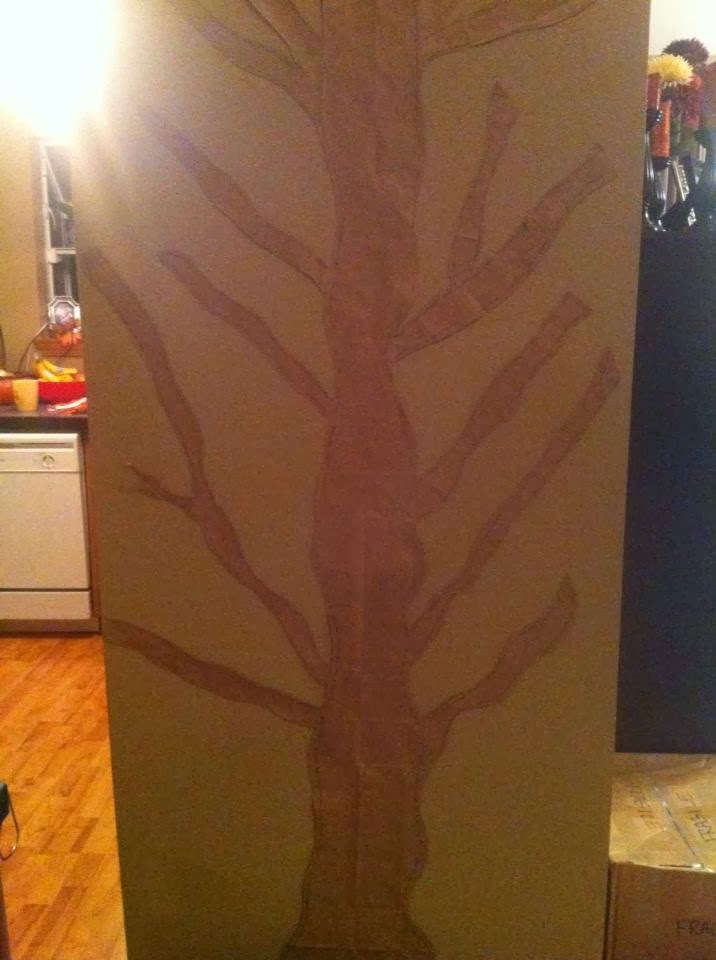 |
| Use 2 bags for the trunk. Create the tree branches using the leftover scraps. |
Step 3:
Use the scraps from your tree trunk to cut out tree branches. Again, you can create a design and then cut or just wing it. Can you tell I'm a fan of winging it?
Make sure that you have different size branches. Make some longer, some shorter, some fatter, etc. I also like to tape two branches of different sizes together to create a "V" shaped branch. This will make your tree look more natural.
Step 4:
Outline your tree in black sharpie, especially if you have brown, beige or tan colored walls like I do! This will make your tree stand out against your wall color.
Step 5:
Cut out leaves in Fall colors. I prefer the Maple leaf because it provides more room to write your thankful message. Here's the template I use that you can download. For the leaf paper, I just use some of my son's construction paper and spend an afternoon cutting out leaves and watching Christmas movies on the Hallmark Channel. Good times!
Make sure that you cut out enough leaves for everyone in your family for the month of November. Don't forget to cut out extras for guests and visitors!
Step 6:
Each day have everyone in your family write their Thankful message. Ours look like this: I'm Thankful for___________. William 11/15/2013. Don't forget to sign and date them! I also give any visitors to our home the option of writing their own Thankful leaf. They can either take the leaf home with them as a reminder of what they are thankful for or put it on our Thankful Tree.
 |
| One Week into November & our Thankful Tree is looking great! |
TIP- Each year I keep the old leaves and make a garland out of them. It's awesome to watch my son's handwriting change through the years and see what everyone is thankful for- now that is a truly beautiful thing!
No comments:
Post a Comment